uReserve Gold
User's Guide


Copyright (c) 2000 - 2006
Microburst Technologies, Inc.
http://www.uburst.com


Table of Contents

  1. Introduction
  2. Features
       New Features of Gold!
       Previous Features from Deluxe (Version 3)
  3. System Requirements
       More About Perl
  4. CGI Script Configuration
  5. Installing uReserve For the First Time
  6. Upgrading from uReserve Deluxe 3.x to uReserve Gold
  7. Troubleshooting
  8. Main Control Panel
  9. General Settings
       Display Preferences
       Reservation Form Configuration
          Reservation Window Size
          Reservation Message Prompts
          Reservation Form Fields
          Reservation Booking Format
          Recurring Reservation Options
       E-mail Settings
          General E-mail Settings
          Admin E-mail Subjects
          User E-mail Subjects
          E-mail Transport
       Report Preferences
       Colors and Fonts
  10. Manage Categories
       Add Category
       Edit Category
       Delete Category
       Copy Category
       Reorder Categories
       Categorize Resources
  11. Manage Resources
       Resource Fields
       Add Resource
       Edit Resource
       Delete Resource
       Reorder Resources
       Blackout Dates
          Add Blackout Date
          Cancel Blackout Date
  12. Authorized Users
       Add Authorized User
       Edit Authorized User
       Delete Authorized User
       Blocked Users
  13. Pending Reservations
       Approve or Reject Pending Reservation
       Advanced Approve or Reject Pending Option
  14. Reports
  15. Utilities
          E-Mail Reservation Reminders
          Manage Images
          View Logs
          Export Data
          Purge Old Data
          Upgrade Data Files (non-hosted version only!)
  16. Security Settings
  17. Using uReserve Gold
       Viewing the Resource Schedule
       Reserving a Resource
       Viewing Reservation Info
       Modifying or Deleting a Reservation

Introduction

uReserveTM Gold is an advanced online scheduling system that allows members in your organization to reserve resources or make appointments over the Web! User-friendly, web-based interfaces make it easy for people to check availability and request reservations. Advanced features allow the administrator to configure up to twenty-two (22) different pieces of information to collect on the reservation form!


Features

If you are new to uReserve, take a look at the extensive lists of both new (Gold Edition) and old (Deluxe Edition) features that are available in this flexible online scheduling system. Most of the new features have come from customer suggestions, and we are already compiling a list of features for Version 5!

New features of uReserveTM Gold include:


Previous features of uReserveTM Deluxe Version 3 included:

System Requirements

uReserveTM consists of two Perl CGI scripts. System requirements are:


More About Perl

Perl (Practical Extraction and Report Language) is an open-source, interpreted procedural programming language.
Perl is free software, and is licensed under both the Artistic License and the GNU General Public License.
Perl is available for most Web server operating systems. It is more prevalent on Unix and Unix-like systems (such as Linux, FreeBSD, and Mac OS X), but is growing in popularity on Microsoft Windows systems.

A good resource for getting the latest Perl distribution for your Web server is found here
http://www.perl.com/download.csp#stable

ActiveState is another good resource for a free version of Perl for Windows-based web servers. Visit http://www.activestate.com for more information.

CPAN, the Comprehensive Perl Archive Network, is a collection of mirrored web sites that serve as a primary archive and distribution channel for Perl sources, distributions, documentation, scripts, and—especially—modules. It is commonly browsed with the search engine http://search.cpan.org.


CGI Script Configuration

The uReserveTM Gold program is comprised of two CGI-Perl scripts and three supporting text files: Before installing the program on your Web server, you will need to configure just one file: The languages-gold.pl script should be put in your cgi directory without any modifications, and the help-gold.txt, colors.txt, and fonts.txt files should be put in your "data" directory without any modifications.

In order to configure the ureserve_gold.pl script, you need to edit the file using any standard text editor, such as NotePad or WordPad, and answer the configuration questions at the top of the script. Below are some instructions to help you answer the questions and configure the script for your server.

NOTE: If you've never installed or executed any Perl scripts on your server before, it is recommended that you first try installing our basic test script as described on the following reference page:

http://www.uburst.com/uReserve/testscript.html

By installing this basic Perl script first, it should help you to understand how to install and execute scripts on your server. It also will verify that your web hosting account is configured properly to run Perl scripts and will make installing the uReserveTM Gold script that much easier.

1. What is the path to Perl on your server?

The uReserveTM Gold script is written in the Perl programming language and so in order for it to run, you must specify the location of Perl on your Web server on the very first line of this script.

Typical locations are:

#!/usr/bin/perl
#!/usr/local/bin/perl
#!/bin/perl

(Note that the #! ("pound shebang") characters are required and should be included when specifying the path). You can ask your Web Hosting Provider for the location of Perl on your server. If Perl is not installed on your Web server, reference More About Perl for more information.

2. What is your uReserve Gold License Number?

For this configuration question, enter the license number that you were given when you purchased uReserveTM Gold. To do this, replace or type over this line in the uReserveTM CGI script. In other words, change this line in the script from:

$license_number = "UNREGISTERED VERSION";

to something like:

$license_number = "ABC-123-456-789";

... where "ABC-123-456-789" is the official license number that was assigned to you when you purchased uReserveTM Gold.

3. What is your company's/organization's name?

For this configuration question, enter the name of your company/organization that will be using uReserveTM Gold. An example value for this configuration question is:

$company_name = "My Company";

4. What is your website URL?

For this configuration question, enter the full URL of your website. An example value for this configuration question is:

$website = "http://www.mydomain.com";

5. What is the URL of this script on your website?

After you finish configuring this script, you will be putting in your "cgi-bin" or "cgi-local" directory on your server, so for this configuration question, enter the full URL of where this script will be installed on your server. An example value for this configuration questions is:

$script_url = "http://www.mydomain.com/cgi-bin/ureserve_gold.pl";

6. What is the full or relative path to your data directory?

As part of the installation of this uReserveTM script on your server (which is described in the next section), you will need to create a "data" directory on your server. This "data" directory is where uReserveTM will store all of the resource and schedule data files. The "data" directory should be created as a subdirectory of your "cgi-bin" or "cgi-local" directory. If you call the data directory "data" and create it as a subdirectory of your "cgi-bin", a typical answer for this question would be:

$data_directory = "./data/";

You will also need to create 4 subdirectories under this data directory, with the following names:
         10min
         15min
         30min
         60min
...and give each directory read/write permissions

Note that the value is specified relative to where the ureserve_gold.pl script will be located. In some cases, however, you may need to specify this question as the full directory path to your data directory....such as "/www/youraccount/cgi-bin/data/" on UNIX servers, or "C:/users/youraccount/cgi-bin/data/" on NT servers.

7. What is the name of the settings files? For Advanced Users Only!

Most users will NOT need to change this setting, therefore, you can skip this question.

8. What would you like to be the start time of your reservation schedule?

This configuration question allows you to specify the start time of your daily online schedule display. Unless you are planning on using "Configurable Column Names" instead of specifying 10-min, 15-min, 30-min, or 60-min timeslots, this time should be specified as a 24-hour time. Valid values will range from "0" to "23". For example, if you want your schedule display to start at 8 o'clock in the morning, then you would set this value to:

$gtime_range_start = "8"; # set this as your schedule start time for the 10, 15, 30 or 60 min configuration

...or if you are going to use "Configurable Column Names" instead of specifying 10-min, 15-min, 30-min, or 60-min timeslots, this value must be set to "0".

$gtime_range_start = "0"; # set this to ZERO if you are going to configure your column names

9. What would you like to be the end time of your reservation schedule?

This configuration question allows you to specify the end time of your daily online schedule display. Unless you are planning on using "Configurable Column Names" instead of specifying 10-min, 15-min, 30-min, or 60-min timeslots, this time should be specified as a 24-hour time. Valid values will range from "1" to "24". Note that the $time_range_stop time MUST BE GREATER THAN the $time_range_start value that you configured in the previous question.

For example, if you want your schedule display to run up to 6 o'clock at night, then you would set this value to:

$gtime_range_stop = "18"; # set this as your schedule end time for the 10, 15, 30 or 60 min configuration

...or if you are going to use "Configurable Column Names" instead of specifying 10-min, 15-min, 30-min, or 60-min timeslots, this value must be set to "0".

$gtime_range_stop = "0"; # set this to ZERO if you are going to configure your column names

10. What image would you like at the top of your schedule pages?

This configuration question allows you to specify the URL of any image that you would like to be displayed at the top of your online schedule displays. This value must be a FULL URL, beginning with "http" - so an example value might be:

$gpage_image = "http://www.yourdomain.com/images/mylogo.gif";

If you do not want any image displayed on the page, then just set this value to "NONE" (in ALL CAPS).

11. What is the administrator's password?

This configuration question allows you to specify a password for the uReserveTM administrator to use when installing the program and setting themselves up as an authorized user for the first time. The uReserveTM administrator will have special privileges for configuring and administering the entire program. Furthermore, the administrator will be authorized to modify or delete any reservation ... even if it was password protected when it was created. An example value for this configuration question is:

$gen_admin_login_password = "admin";

12. What is the name of the uReserve Gold language file?

This configuration question will be further implemented in future versions of uReserve. It represents multi-language translation file names. Leave this question unchanged!

require "languages-gold.pl"; # DO NOT MODIFY

13. What columns would you like to have? (CONFIGURABLE COLUMNS VERSION ONLY)

Skip this question if you are going to be setting up your schedule in either 10-min, 15-min, 30-min or 60-min timeslot increments.

If you don't want to set up your schedule in either 10-min, 15-min, 30-min or 60-min timeslots, you can configure the Column Names. You must specify them in the order that you want them to appear on the schedule. Change the values below to match your needs, adding additional values within single quotes ( ' ' ) and separated by commas. The last column name will not appear on the schedule but is needed during the scheduling process as reservations will be offered from one column name until the next. (This will become more clear once you have installed the script and can see the reservation form.)

@column_names = ('Period 1','Period 2','Period 3','Period 4','Period 5','Period 6','Period 7','End of Day');

14. What is the full or relative path to your default image directory?

Specify the path to a folder on your Web server where you will store images used with your online schedule. A built-in Administrative utility will let you upload images to this directory, and remove images from this directory.

A typical path would be something like this:

$default_image_dir = "/usr/www/users/YourUserName/images/";

15. What is the URL of your default image directory (to the directory specified above in #14)?

Specify the path to a folder on your Web server where you will store images used with your online schedule. A built-in Administrative utility will let you upload images to this directory, and remove images from this directory.

A typical URL would be something like this:

$default_image_dir_url = "http://www.yourdomain.com/images/";


Installing uReserve For the First Time

UPGRADE NOTE: If you are upgrading from uReserve Deluxe (v3.x), skip to next section.

After editing/configuring the ureserve_gold.pl script, as described in the Configuration section of this User's Guide, you will need to install both the ureserve_gold.pl file and the languages-gold.pl in the cgi directory on your server. To do this:

  1. Use your favorite FTP program to transfer the "ureserve_gold.pl" file and the "languages-gold.pl" file to the CGI directory on your server. IMPORTANT! When transferring this file, be sure to transfer it in ASCII or TEXT transfer mode (as opposed to BINARY or RAW transfer mode).


  2. Once the scripts have been transferred to the CGI directory on your server, give them READ and EXECUTE permissions. If you have a UNIX server, you can give the script READ and EXECUTE permissions (chmod 755) with your FTP program. If you have an NT server, then you may have to get your web hosting provider to give the script EXECUTE permissions for you.


  3. As specified in the previous section, you will need to create a directory on your server where the uReserveTM data files can be stored. To do this, use your FTP program to create a new subdirectory called "data" in the cgi (typically called "cgi-bin") directory on your Web server.


  4. Once the "data" directory has been created in the CGI directory on your server, you will need to give that directory WRITE and EXECUTE permissions. If you have a UNIX server, you can give the directory WRITE and EXECUTE permissions (chmod 733) with your FTP program. If you have an NT server, then you may have to get your web hosting provider to give the directory WRITE permissions for you.


  5. Finally, create four more folders below your "data" directory, having these names:
    • 10min
    • 15min
    • 30min
    • 60min

    Give these folders WRITE and EXECUTE permissions as you did in the previous step.
After following the above steps to install uReserveTM Gold on your Web server, you can test that it is setup correctly by opening your browser and typing the full URL of the ureserve_gold.pl script on your server into the LOCATION box on your browser. This URL should be the same URL that you specified in question #5 of the script setup, such as:

http://www.mydomain.com/cgi-bin/ureserve_gold.pl

Upon doing so, you should see the either the uReserveTM Gold copyright page (if this is the first time using uReserveTM... or the uReserveTM online schedule display if you have already created some resources). If you do not see the uReserveTM Gold copyright page or the uReserveTM Gold schedule display...and instead see some sort of a "Server Error", then something is not setup correctly, see the Troubleshooting section below.


Upgrading from uReserve Deluxe (v3.x) to uReserve Gold

INSTALLATION NOTE: If you are not upgrading from uReserve Deluxe (v3.x), follow the installation instructions in the previous section.

Before beginning the upgrade, make a backup copy of both the ureserve_gold.pl script, and the entire data directory plus subfolders. Move your backup files somewhere for safekeeping, in the event that something does not work properly after upgrading. Unzip the urd4.zip file that you downloaded with your license. Open up the ureserve_gold.pl file with a text editor (such as Windows Notepad). Configure the questions at the top of the ureserve_gold.pl script, as described in the Configuration section of this User's Guide. Install both the configured ureserve_gold.pl file and the languages-gold.pl in the cgi directory on your Web server. To do this:

  1. Use your favorite FTP program to transfer the "ureserve_gold.pl" file and the "languages-gold.pl" file to the CGI directory on your server. IMPORTANT! When transferring this file, be sure to transfer it in ASCII or TEXT transfer mode (as opposed to BINARY or RAW transfer mode).


  2. Once the scripts have been transferred to the CGI directory on your server, give them READ and EXECUTE permissions. If you have a UNIX server, you can give the script READ and EXECUTE permissions (chmod 755) with your FTP program. If you have an NT server, then you may have to get your web hosting provider to give the script EXECUTE permissions for you.


  3. Put the new "help-gold.txt", "colors.txt", and "fonts.txt" files into your data directory.


  4. Make sure you still have four data folders ("10min", "15min", "30min" and "60min") under your data directory, and that these folders have WRITE and EXECUTE permissions. These folders should STILL contain any PREVIOUS v3.x reservation file data.


  5. Note: You might need to give these files full (chmod 777) permission if you have any trouble reading/writing new reservation data.

  6. Verify that the following files are still in your data directory, and that you didn't accidentally delete them or move them into your reservation data directory (these do not go into your "10min", "15min", "30min" or "60min" directories).

Log in to the uReserve Administrative Control Panel as you would normally do. (If you can not get to the uReserveTM Gold Admin Control Panel, and instead see some sort of a "Server Error", then something is not setup correctly, see the Troubleshooting section below.)
Choose "Utilities" and then "Upgrade Data Files". On the "Upgrade Data Files" screen, select the "Upgrade Data Files" button to begin the data conversion of your old v3.x files to the new Gold Edition data file format.
After the data file upgrade has completed, verify that the following file was created in your data directory:


Troubleshooting

In order to keep the troubleshooting information as up-to-date as possible, we have moved this Troubleshooting section to the uReserveTM online reference site at:

http://www.uburst.com/uReserve/reference.html


uReserve Gold Administrative Control Panel

Once the CGI script is correctly installed on your server, you are ready to start using uReserveTM Gold. Begin by logging in to the Administrative Control Panel, and if the is the first time using uReserve, create some resources.

Logging In

In order to login to the uReserveTM Gold Administrative Control Panel, the administrator can use his/her browser to go to the URL of the uReserveTM script on your server ... followed by a special "?command=login" tag. This will actually be the same URL that you specified in configuration question #5... followed by "?command=login" such as:

http://www.mydomain.com/cgi-bin/ureserve_gold.pl?command=login

TIP: To make logging in easier in the future, the administrator may want to bookmark this URL.

To login as the primary System Administrator for the very first time, enter the password that you specified in question #11 of the script setup for both the username and password on the Log In screen.

Tip! After you are logged in for the first time, you might want to change the username and password for the System Admin. Use the Authorized Users function to "Edit" the System Admin and assign a different username and password. When you select the "Save" button after changing the System Admin username and/or password that you are currently logged in to, you will be logged off and you will have to log back in using the modified username and/or password.


General Settings

Only System Administrators have access to the General Settings. System Administrators can configure preferences for the way the resource schedule is displayed and rules that apply for making, viewing, modifying and deleting reservations.

Display Preferences

Various schedule display parameters can be configured by choosing "General Settings" from the Administrative Control Panel, and then choosing the "Display Preferences" option.

The following table describes the configurable schedule display parameters:

  Form Field Description
1 Reservation Timeslot Size This setting allows you to specify the size of reservation timeslots. Valid values are "Ten Minutes", "Fifteen Minutes", "Thirty Minutes", "Sixty Minutes", and "Configured Column Names". If you choose "Configured Column Names", make sure you have pre-configured the additional required information in the ureserve_gold.pl script, Configuration Question #13.

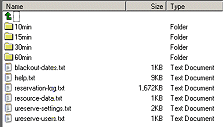
Important Note: Reservation data is stored in separate data directories for each of these settings, so changing between settings will appear to "lose" current reservation data. "Configured Column Names" will, however, always read and write reservations in the "60min" subdirectory.
2 Schedule Display Format This setting allows you to specify the default display format of your reservation schedule, although you can also configure this setting individually, by resource. Valid options are "Daily", "Weekly" or "Monthly". If "Daily" is selected, the schedule will default to showing one day at time. If "Weekly" is selected, the schedule will default to showing one week at a time. If "Monthly" is selected, the schedule will default to showing one month at a time. You can configure the optional "Toggle View Bar" to display on the schedule (see Show Toggle View Bar description below) to enable the user to switch between schedule views.

Note: If "Show Weekends" is set to "No", the weekend days will not display when using the "Daily" or "Weekly" schedule, but will appear "blacked out" on the monthly schedule.
3 Default Schedule Display Date This setting allows you to specify a date that the schedule will default to showing. This is handy when you want people to make reservations for a specific date only, such as for a single day when parent-teacher conferences are being held. Date format should be MM/DD/YYYY or DD/MM/YYYY, depending on whether you are using US or European date format.
4 Choose How Categories Are Displayed If you have categorized your resources, you can optionally show a single menu of resource categories as your main schedule entry page, or show all of the resources grouped by category on the schedule.
  • Choose Show Category Menu On Entry Page if you want to show the menu of resource categories as your schedule entry page.
  • Choose Show All Categories And Resources On One Page if you instead want to show all resources grouped by category on one schedule page.
  • Choose Don't Display By Category if you are not categorizing your resources.
5 Show Category Menu Hyperlink This setting enables a hyperlink to the Category Menu to be displayed at the top of the schedule. Valid values are "YES" or "NO". The default value is "YES".

If this value is set to "YES" and the "Show Toggle View Bar" setting (see below) is "NO", the Category Menu hyperlink will be shown at the top center of the schedule pages. If this value is set to "YES" and the "Show Toggle View Bar" setting is "YES", the Category Menu hyperlink will be added to the Toggle View Bar.

If the setting "Choose How Categories Are Displayed" is set to "Don't Display By Category" or "Show All Categories and Resources On One Page", this setting will be ignored.
6 Show Admin Log In Hyperlink This setting enables a hyperlink to the Administrative Control Panel to be displayed on the schedule. Valid values are "YES" or "NO". The default value is "NO". If this value is set to "YES", a hyperlink to the Administrative Control Panel will be shown on the schedule. This hyperlink can be positioned above (top) and/or below (bottom) the schedule, left, right, or centered.
7 Show Toggle View Bar This setting enables a hyperlinked "toggle bar" of alternate schedule views to be displayed above or below the schedule. This toggle bar enables the user to switch between the Daily, Weekly, and Monthly views of the schedule. Valid values are "YES" or "NO". The default value is "YES". If this value is set to "NO", there will be no ability for the user to switch between schedule views.

Note: If "Show Category Menu On Entry Page" has been configured, and "Show Category Menu Hyperlink" is set to "YES", an additional link to the Category Menu will be added to the schedule view "toggle bar".
8 Show Navigation Buttons This setting allows you to specify whether to show the Previous/Next schedule Navigation Buttons, and where to position these buttons. Navigation buttons can be placed above (top) and/or below (bottom) the schedule, left, right or centered.
9 Date Format This setting allows you to specify whether to use US date format (MM/DD/YYYY) or EUROPEAN (DD/MM/YYYY) date format. Valid values are "US" or "EUROPEAN". The default value is "US".
10 Time Format This setting allows you to specify whether the times on weekly reservation schedule will be displayed in STANDARD (AM-PM) format or in MILITARY (24-HOUR) format. Valid values are "STD" or "MIL". The default value is "STD".
11 Server Timezone Adjustment This relates to the Administrative Security Setting called "Prevent Expired Timeslot Reservations". If "Prevent Expired Timeslot Reservations" is set to "YES", then uReserve uses the server time to determine if a reservation is being made for a timeslot which has already passed. If your web server is in a different timezone from where your primary users are making reservations, set the "Server Timezone Adjustment" to the number of hours to adjust the expired timeslot calculation.

This value is in hours, from -23 to +23, and defaults to 0.
12 Weekly/Monthly View Start Day This setting allows you to specify whether the weekly reservation schedule will begin on SUNDAYS or MONDAYS. Valid values are "SUN" or "MON". The default value is "SUN". Important: Changing this setting will change the format of the data file names. Do NOT change this setting if you already have reservation data that you do not want to "lose".
13 Show Weekends This setting allows you to specify whether the weekly reservation schedule will show weekend days or not. Valid values are "YES" or "NO". The default value is "YES".
14 Maintain Action Log This setting allows you to specify whether or not to record all reservations in a log file. Valid values are "YES" or "NO". The default value is "YES". 
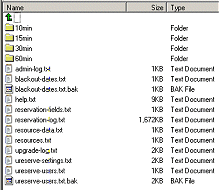
Note that while this setting is set to "YES", a bar-delimited log file called "reservation-log.txt" is maintained in your "data" directory.
15 User Permission Level This setting allows you to specify the general permission level of your reservation system. The permissions levels have been defined as follows:
1 - Anyone can make single reservations or recurring reservations.
2 - Anyone can make single reservations, but only authorized users can make recurring reservations.
3 - Only authorized users can make single reservations or recurring reservations.
4 - Anyone can make single reservations, but no one can make recurring reservations.
5 - Only authorized users can make single reservations, and no one can make recurring reservations.
16 Reserve Character This setting allows you to specify the character(s) used to indicate reserved (not available) time slots on the daily schedule tables. The default setting is "R".
17 Daily/Weekly Reserve Image This setting allows you to specify an image that will be used to indicate reserved (not available) time slots on both the daily and weekly schedule tables. If you want to specify a reserved icon, then specify this setting as the full URL of the image that you want to use. If you do not want to use an image, just specify this setting as "".
18 Daily/Weekly Reserve Image Alt Text This setting allows you to specify an "ALT" message that will be associated with the "Daily/Weekly Reserve Image" icon (if any) that was specified, and this text will appear as a pop-up text box when the mouse is held over the image on the schedule.
19, 20 Daily/Weekly Calendar Cell Width/Height This setting allows you to specify the width and height of each timeslot on the daily and weekly schedule. The default value is "20" pixels, but this may need to be increased if you specify a large "reserve character" or a large "reserve image".
21 Daily/Weekly Reservation Instructions This setting allows you to specify the instructions that appear under each daily or weekly schedule. The default value is "To reserve a resource, click on the resource's name."
22, 23 Monthly Calendar Cell Width/Height This setting allows you to specify the width and height of each timeslot on the monthly schedule. The default value is "60" pixels.
24 Monthly Calendar Reservation Instructions This setting allows you to specify the instructions that appear under each daily schedule table. The default value is "To reserve a resource, click on the calendar date."
25 Only Show Reserved When Full This setting allows you to specify whether you want the monthly calendar cells to be colored in the "reserved" or "pending" color only when all of the timeslots for the given day are reserved (or pending). Set this to "NO" if you want the monthly calendar cells to display in the reserved or pending color when at least one reservation or pending reservation is made on a given day. The default value is "NO".
26 Monthly Reserve Image This setting allows you to specify an image that will be used to indicate timeslots with reservations on the monthly calendar. Confirmed reservations always take precedence over any pending reservations, so if there are both confirmed and pending reservations on the same day, the image that will show will be the "Monthly Reserve Image", not the "Monthly Pending Image". If you want to specify a monthly reserved icon, then specify this setting as the full URL of the image that you want to use. If you do not want to use an image, just specify this setting as "". The default is "";
27 Monthly Reserve Image Alt Text This setting allows you to specify an "ALT" message that will be associated with the "Monthly Reserve Image" icon (if any) that was specified, and this text will appear as a pop-up text box when the mouse is held over the image on the schedule.
28 Monthly Pending Image This setting allows you to specify an image that will be used to indicate pending reservation time slots on the monthly calendar. If there are confirmed reservations on the same day, then the reserved image or reserved color takes precedence. The pending image will show only when the only reservation(s) for that day are pending. If you want to specify a pending reservation icon, then specify this setting as the full URL of the image that you want to use. If you do not want to use an image, just specify this setting as "". The default is "";
29 Monthly Pending Image Alt Text This setting allows you to specify an "ALT" message that will be associated with the "Monthly Pending Image" icon (if any) that was specified, and this text will appear as a pop-up text box when the mouse is held over the image on the schedule.
30 Monthly Day-is-Full Image This setting allows you to specify an image that will be used to indicate a day where all timeslots are reserved on the monthly calendar. If you want to specify a day-is-full icon, then specify this setting as the full URL of the image that you want to use. If you do not want to use an image, just specify this setting as "". The default is "";
31 Monthly Day-is-Full Image Alt Text This setting allows you to specify an "ALT" message that will be associated with the "Monthly Day-is-Full Image" icon (if any) that was specified, and this text will appear as a pop-up text box when the mouse is held over the image on the schedule.
32 Show Hyperlinks to Calendars This setting controls whether or not to show a table of hyperlinks to each monthly calendar at the top of the monthly calendar view page. Set this to "NO" if you do not want to see the table of hyperlinks at the top of your monthly calendar view page. The default value is "YES".
33 Hyperlinks Columns This setting allows you to specify the number of columns to use when displaying the table of hyperlinks to each calendar on the Monthly view page. The default value is "4".
34 Hyperlinks Table Color This setting allows you to specify the color of the hyperlinks table at the top of the Monthly calendar view. The default value is "#FFFFFF" (white).
35 Hyperlinks Font Size This setting allows you to specify the font size for the hyperlinks in the table at the top of the Monthly calendar view. The default value is "1".
36 Hyperlinks Font Face This setting allows you to specify the font face type for the hyperlinks in the table at the top of the Monthly calendar view. The default value is "Verdana,Arial,Helvetica".

Table 1: Display Preferences Form Fields

Reservation Form Configuration

The administrator can configure the size of the reservation form pop-up window, the wording of various user message prompts, up to twenty-two form entry fields, the reservation booking format, and the recurring reservation options to offer.

By choosing "General Settings" from the Administrative Control Panel, then choosing "Reservation Fields", the Reservation Form Configuration form is displayed. Enter preferences and click on "Apply" to save the settings.

The tables below describe the configurable reservation form parameters in detail.

Reservation Window Size

Configure the size of the reservation form pop-up window.
  Form Field Description
1 Reservation Window Height This setting allows you to specify the height of the pop-up reservation form window. The default setting is "600" pixels.
2 Reservation Window Width This setting allows you to specify the width of the pop-up reservation form window. The default setting is "400" pixels.

Table 2: Reservation Window Size


Optional [User Message] Prompts

Accept the default user message prompts shown, or change the messages for your own preference.

Tip! If you want to force users to enter a password along with their reservation, but you are not defining Authorized Users for the system, check the "Force Password Required" checkbox on this screen.

  Form Field Description
1 Reservation Prompt This setting allows you to override the default "Enter contact information below:" prompt.
2 Protect Reservation Prompt This setting allows you to specify a password prompt string for the reservation form. The default setting is "Enter a password to protect your reservation: (Optional)".
3 Recurring Events Prompt This setting allows you to override the default "An authorized user name and password is required:" prompt.
4 Authorized User Recurring Events Prompt This setting allows you to override the default "A user name and password is required for recurring events:" prompt.
5 Password Field Prompt This setting allows you to specify the general password prompt string. The default setting is "Password".
6 Password Required Prompt This setting allows you to override the default "*A password is required for all modifications" message. However, the password requirement is not enforced unless the checkbox below this prompt, "Force Password Required", is checked.
7 Force Password Required? This checkbox allows you to control whether users will be forced to enter an arbitrary password along with a reservation, for purposes of preventing unauthorized changes to the reservation. Leaving this box unchecked means that a reservation can be made without entering a password, provided the resource permission level does not require username and password. Checking this box means that a reservation password must be entered with each reservation. The "password" is arbitrary, but should be something that isn't obvious and can't be easily guessed.

If the user needs to modify or cancel a reservation that was protected by a "password", the "password" stored with the reservation will need to be used to make the change.

Table 3: Optional User Message Prompts


Reservation Form Fields

Configure up to twenty-two entry fields that will show on your reservation form. Define field labels, types, option lists, display types, and specify which fields are required.
  Form Field Description
1-22 Field n Field Label Field Labels 1-22 allow you define the names of reservation field prompts that will appear on the reservation form.
1-22 Field n [Field] Type Field Types 1-22 allow you to configure the type of fields to show beside the field labels. For fields of type Checkbox, Radio Button, Single-Select List, or Multi-Select List, enter options in the *Options entry box, separating choices by commas. Example: option 1,option 2,option 3
  • Use a Single Line Text field when the user might enter a short textual response.
  • Use a Multi Line Text field when the user might enter a multi-line textual response.
  • Use a Checkbox when the user should select one or more of the choices presented. Options must be entered in the *Options entry box, separating choices by commas. Example: option 1,option 2,option 3
  • Use a Radio Button when the user must answer one and only one of the choices presented. Define options in the *Options entry box, separating choices by commas. Example: option 1,option 2,option 3
  • Use a Single Select List when the user should select only one of the choices presented. Options must be entered in the *Options entry box, separating choices by commas. Example: option 1,option 2,option 3
  • Use a Multi-Select List when the user should select one or more of the choices presented. Options must be entered in the *Options entry box, separating choices by commas. Example: option 1,option 2,option 3
  • Use a Email Address when the user should enter an e-mail address.
  • Use a URL field when the user should enter a web page address or other hyperlink.
1-22 Field n Display Field Displays 1-22 allow you to define the way in which the associated Field Labels will display.
  • Show Label will display the Field Label beside the reservation form field.
  • Hide Label will not display the Field Label beside the reservation form field.
  • Hidden will display the Field Label beside the reservation form field but will hide the information from public viewing after the reservation is made.
1-22 Field n Required Check this box associated with a reservation form field that you want to require entry from the user. If this box is not checked, the user can leave the reservation form field blank or unselected. This is especially important if, for example, you want to force the user to enter a Name and a valid e-mail address for sending the reservation receipt or e-mailing a reservation reminder.

Table 4: Reservation Form Fields


Reservation Booking Format

Reservation booking format applies to the way in which times and dates are used on the reservation form. Choose from either STANDARD, DAILY or DATE RANGE format. The main difference between the choices is that STANDARD format requires the user to enter reservation times, while DAILY and DATE RANGE format requests days or dates from the user.
  Form Field Description
1 Standard Format This is the default reservation format that prompts users to enter a reservation start time and end time. Reservations of this type do not span multiple days, but can be made to be recurring reservations.
2 Daily Format This reservation format does not ask the user for a reservation start and end time, it deals with full-day reservations. Users are prompted for number of days (or nights), for example, that the reservation will span.
3 Date Range Format This reservation format does not ask the user for a reservation start and end time, it also deals with full-day reservations, but different from Daily Format, it prompts user for both the starting date and the ending date of the reservation.

Table 5: Reservation Booking Format


Recurring Reservation Options

Recurring reservation options are only applicable when the STANDARD booking format has been selected. They do not apply for the DAILY or DATE RANGE booking format. Configure the recurring reservation options that you want to offer users when booking reservations. Free-form selections will allow users to input number of days/weeks/months, while Fixed selections will show a drop down list of fixed recurring event choices based on the options configured.
  Form Field Description
1 Free-form or Fixed The difference between Free-form recurring and Fixed recurring is that Free-form allows the user to enter a choice, while Fixed forces the user to select from a pre-defined set of choices. Freeform will allow users to input number of days/weeks/months, while Fixed will show a drop down list of fixed recurring event choices based on the options configured.
2 Daily, Weekly, Bi-Weekly and Monthly Options If you are going to allow recurring reservation to be placed, configure the Daily, Weekly, Bi-weekly and/or Monthly recurring event options that are available. Specify a Min value of at least 2, and a Max value that does not exceed 100.
Table 6: Recurring Reservation Options

E-mail Settings

The admin can configure notification e-mail addresses, as well as e-mail subjects and the server e-mail method.

The following tables describe the e-mail settings parameters:

General E-mail Settings

Optionally specify a Primary and/or Secondary e-mail address to which reservation notification e-mails will be sent. Optionally choose to e-mail the user a receipt of the reservation. Important Note: If you want to e-mail a reservation receipt to each user, be sure to configure a field on the reservation form for inputting the user's e-mail address, AND also configure that field to be a required field.

If you would like to configure other e-mail addresses to receive reservation notifications by resource, use the "Authorized Users" feature to create users with "Resource Admin" privilege. See Add Authorized User for more information on configuring Resource Admins to receive reservation e-mail notifications.
  Form Field Description
1 Primary Notification E-Mail This setting allows you to specify a primary administrator e-mail address which is used for reservation notifications and reports.
2 Secondary Notifiction E-Mail This setting allows you to specify a secondary administrator e-mail address which is used for reservation notifications and reports.
3 E-Mail User This setting allows you to specify whether or not to email the user (whoever is creating/modifying a reservation) a receipt of the reservation. Valid values are "YES" or "NO".

Table 7: E-Mail Settings Form Fields

Admin E-mail Subjects

  Form Field Description
1 Admin E-Mail Subject - Reservation Added This setting allows you to specify the subject that will appear on e-mail notifications that are sent to the administrator when a reservation is added (and is not pending).
2 Admin E-Mail Subject - Reservation Pending This setting allows you to specify the subject that will appear on e-mail notifications that are sent to the administrator when a pending reservation is made.
3 Admin E-Mail Subject - Reservation Modified This setting allows you to specify the subject that will appear on e-mail notifications that are sent to the administrator when a reservation is modified.
4 Admin E-Mail Subject - Reservation Cancelled This setting allows you to specify the subject that will appear on e-mail notifications that are sent to the administrator when a pending reservation is deleted (cancelled).
5 Admin E-Mail Subject - Pending Reservation Accepted This setting allows you to specify the subject that will appear on e-mail notifications that are sent to the administrator when a pending reservation is deleted (cancelled).
6 Admin E-Mail Subject - Pending Reservation Rejected This setting allows you to specify the subject that will appear on e-mail notifications that are sent to the administrator when a pending reservation is deleted (cancelled).

Table 8: Admin E-mail Subjects

User E-mail Subjects

  Form Field Description
1 User E-Mail Subject - Reservation Added This setting allows you to specify the subject that will appear on e-mail notifications that are sent to the user when a reservation is made (and is not pending).
2 User E-Mail Subject - Reservation Pending This setting allows you to specify the subject that will appear on e-mail notifications that are sent to the user when a reservation is created but is pending.
3 User E-Mail Subject - Reservation Modified This setting allows you to specify the subject that will appear on e-mail notifications that are sent to the user when a reservation is modified.
4 User E-Mail Subject - Reservation Cancelled This setting allows you to specify the subject that will appear on e-mail notifications that are sent to the user when a reservation is cancelled.
5 User E-Mail Subject - Pending Reservation Accepted This setting allows you to specify the subject that will appear on e-mail notifications that are sent to the user when a reservation is cancelled.
6 User E-Mail Subject - Pending Reservation Rejected This setting allows you to specify the subject that will appear on e-mail notifications that are sent to the user when a reservation is cancelled.

Table 9: User E-mail Subjects

E-mail Transport

Specify the e-mail method used by CGI scripts on your Web server. "SENDMAIL" is typical of Unix/Linux Web servers, while "SOCKETS" is the only valid option for Windows Web servers.
  Form Field Description
1 E-Mail Method This setting allows you to specify the e-mail method used by CGI scripts on your server. Valid options are "SENDMAIL" and "SOCKETS". The default value is "SENDMAIL". If you are not sure what method your server uses, contact your web host. If neither option is used by your web host, request an example from your web host of a CGI script that can send e-mail on your server, and then request help from Microburst's Support Team (support@uburst.com) for configuring this alternate e-mail method to work for you.
2 Sendmail Path This setting allows you to specify the sendmail path if your server uses sendmail to deliver e-mail.
3 SMTP Address This setting allows you to specify the SMTP IP address of your mail server if you are using Sockets to send e-mail.

Table 10: E-mail Transport

Report Preferences

The admin can configure default report preferences which are used each time a report is run. These settings can be changed when the report is generated.

The following table describes the report preferences form parameters:

  Form Field Description
1 Date Range Report Default Start Date This setting will control the default setting of the starting date for the date range report. Valid values are "Current Day" and "Start of Week". The default setting is "Current Day".
2 Date Range Report Default End Date This setting will control the default setting of the ending date for the date range report. Choose a default end date, such as 7 days from the start date, or some number of days, up to 30.
3 Print Empty Timeslots This setting allows you to specify whether empty timeslots should print on reports. Valid values are "YES" and "NO". The default setting is "NO". Set this to "YES" if you want all timeslots - open or reserved - to appear on reports.
4 Print am/pm on Report This setting allows you to specify whether the am/pm indicator should print on reports. Valid values are "YES" and "NO". The default setting is "NO". Set this to "YES" if you want am/pm to appear next to the time on reports.
5 Double-space Report This setting allows you to specify whether reports should be double-spaced. Valid values are "YES" and "NO". The default setting is "NO". Set this to "YES" if you want the report entries to be double-spaced.
6 Run Report for All Resources This setting will control the default setting of whether to run reports for all resources or for selected resources. Valid values are "YES" and "NO". The default setting is "NO". Set this to "YES" if you want to default reports to being generated for all resources.
7 E-Mail Report to Primary Admin This setting allows you to specify the default setting for e-mailing reports to the primary administrator. Valid values are "YES" and "NO". The default setting is "NO".
8 E-Mail Report to Secondary Admin This setting allows you to specify the default setting for e-mailing reports to a secondary administrator. Valid values are "YES" and "NO". The default setting is "NO".
9 Print Report To Screen This setting allows you to specify the default setting for viewing reports on the screen. Valid values are "YES" and "NO". The default setting is "YES".
10 Print Report to File This setting allows you to specify the default setting for saving reports to a file. Valid values are "YES" and "NO". The default setting is "NO". Files will be stored in the data directory associated with the timeslot size (the directories named 10min", "15min", "30min" or "60min"), named in the format "YYYYMMDD_daterange_rpt.txt" or "YYYYMMDD_daily_rpt.txt".

Table 11: Report Preferences Form Fields

Colors and Fonts

The admin can configure schedule color and font preferences.

The following table describes the colors and fonts settings parameters:

  Form Field Description
1 Background Image This setting allows you to specify a background image that will be displayed on all schedule pages. This setting should be specified as the full URL of the image that you want to use - otherwise, set this setting to "NONE" in order to have no background image.
2 Background Color This setting allows you to specify the background color of the schedule pages. The default setting is "#FFFFFF".
3 Schedule Title Color This setting allows you specify the hex-based color of the title that will be displayed on all schedule pages. The default setting is "#F0F0F0".
4 General Font Face This setting allows you to specify the font face used for the title areas of the schedule pages. The default setting is "Verdana,Arial,Helvetica".
5 General Font Size This setting allows you to specify the font size used for the title areas of the schedule pages. The default setting is "2".
6 General Font Color This setting allows you to specify the hex-based font color used for the title areas of the schedule pages. The default setting is "#000000".
7 Graphical Schedule Font Face This setting allows you to specify the font face used within the graphic schedule displays. The default setting is "Verdana,Arial,Helvetica".
8 Graphical Schedule Font Size This setting allows you to specify the font size used within the graphic schedule displays. The default setting is "2".
9 Graphical Schedule Font Color This setting allows you to specify the hex-based font color used within the graphic schedule displays. The default setting is "#000000".
10 Link Color This setting allows you to specify the hex-based link color used for hyperlinks in your schedule pages. The default settings is "#0000FF".
11 Visited Link Color This setting allows you to specify the hex-based vlink color used for visited hyperlinks in your schedule pages. The default settings is "#0000FF".
12 Active Link Color This setting allows you to specify the alink color used for active hyperlinks in your schedule pages. The default settings is "#0000FF".
13 Open Timeslot Color This setting allows you specify the hex-based color of the title that will be displayed on all schedule pages.
14 Reserved Timeslot Color This setting allows you specify the hex-based color of timeslots which are reserved on the schedule. The default setting is "#FFCECE".
15 Pending Timeslot Color This setting allows you specify the hex-based color of timeslots which are pending on the schedule. The default setting is "#FFD700".
16 Unavailable Timeslot Color This setting allows you specify the hex-based color of timeslots which are blacked out or unavailable on the schedule. The default setting is "#C0C0C0".
17 Category Menu Font Face This setting allows you specify the hex-based color of timeslots which are blacked out or unavailable on the schedule. The default setting is "#C0C0C0".
18 Category Menu Font Size This setting allows you to configure the font size used for the Category Menu if the schedule is configured to display by category. The default setting is "2".
19 Category Menu Font Color This setting allows you to specify the hex-based font color used within the graphic schedule displays. The default setting is "#000000" (black).
20 Category Divider Line Color This setting allows you specify the hex-based color of the category divider line, if displaying all categories and resources on one page instead of using a category menu on one entry page. The default setting is "#000000" (black).
21 Category Divider Line Font Color This setting allows you to specify the hex-based font color used within the category divider line, if displaying all categories and resources on one page instead of using a category menu on one schedule entry page. The default setting is "#FFFFFF" (white).
22 Category Divider Line Font Face This setting allows you specify the type of font used within the category divider line, if displaying all categories and resources on one page instead of using a category menu on one schedule entry page. The default setting is "Verdana,Arial,Helvetica".
23 Category Divider Line Font Size This setting allows you to configure the font size used within the category divider line, if displaying all categories and resources on one page instead of using a category menu on one schedule entry page. The default setting is "2".

Table 12: Colors and Fonts Form Fields


Manage Categories

Only System Administrators have access to the Manage Categories functions. Use categories to group like types of resources for easier management of resources when you have a large number of resources. Categories also help in system performance by breaking down the schedule displays into smaller "groups" of resources, instead of always showing all schedules for all resources.

Each function is described in detail below.

Add Category

The administrator can add additional categories in which to place resources for scheduling by choosing the "Manage Categories" button on the Administrative Control Panel, and then choosing the "Add Category" button from the category menu options. The "Add Category" form will be displayed. Enter the required information in the form and choose the "Save" button in order to add the new category.

The following table describes the configurable category fields settings:

  Form Field Description
1 Category Name A unique name of a category, typically one that describes the type of resources that will be in it.
2 Optional Availability Date Range Optionally define a date range for which to show this category (and resources contained within) on the schedule. Entering just a "From" date will allow the category to be available indefinitely, beginning on the specific "From" date. Entering just a "To" date will make the category available on the schedule until the configured ending date. Entering both a From and To date will make the category available only during the configured date range.
3 Category Description Specify a description for this category of resources.
4 Category Image Configure an optional image (.jpg or .gif) to appear at the top of the Category's schedule.
5 Category Background Color Configure the HTML hex background color for the category display.
6 Category Font Color Configure the color of the font to be used when showing the category.
7 Category Font Face Configure the font face to be used when showing the category.
8 Category Font Size Configure the font size to be used when showing the category.
9 Category Default Display Format Specify whether you want the category to initially show in Daily, Weekly, or Monthly format.

Table 13: Add/Edit Category Form Fields

Edit Category

The administrator can edit the static information associated with a category by choosing the "Manage Categories" button on the Administrative Control Panel, and then choosing the "Edit Category" button from the menu of category options. After selecting a category to edit, the "Edit Category" form will be displayed. Modify the necessary information in the form and select the "Save" button in order to save the category configuration changes.

Refer to Table 13: Add/Edit Category Form Fields for the list of category fields that can be edited.

Delete Category

The administrator can delete an existing category by choosing the "Manage Categories" button on the Administrative Control Panel, and then choosing the "Delete Category" button from the menu of category options. Upon choosing the "Delete Category" button, a list of categories to delete will be displayed. Select the category to delete and choose the "Submit" button. After confirming the category deletion, the category will be permanently removed. Any resources that were previously assigned to the category that was deleted will automatically become unassigned, and will no longer be in any category until reassignment by the administrator.

Copy Category

The administrator can copy the information from an existing category to a new category name. Choose the "Manage Categories" button on the Administrative Control Panel, and then choose the "Copy Category" button from the menu of category options. After selecting a category to copy, the "Copy Category" form will be displayed. Give this new category a unique name and modify any other information that is necessary in the form, then choose the "Save" button in order to save the new category configuration.

Reorder Categories

By default, categories are shown in the order in which they were created. The administrator can change the order in which categories are displayed by selecting the "Manage Categories" button from the Administrative Control Panel, and then choosing the "Reorder Categories" button from the menu of category options. The current category list order will be shown. Select a category from the list displayed, and then use the Move Up/Move Down buttons to move the category listing up or down. Select the "Save Changes" button to save any changes made, or select the "Undo Changes" button to cancel current changes and revert to the last saved list order.

Categorize Resources

The administrator can quickly assign resources to categories by using the Categorize Resources function. Choose "Manage Categories" from the Administrative Control Panel, and then choose the "Categorize Resources" button. Current resources and their associated category assignments will be displayed. A resource may only be assigned to one category, or not assigned to any category at all ("unassigned"). Select a category to assign from the drop-down list, and then select one or more resources from the multi-selectable list of resources displayed (multi-select using the SHIFT key or CTRL key). Select the "Assign & Save" button to save category assignments, or select the "Back" button to quit this screen without saving changes and then return to the Manage Categories Menu.


Manage Resources

Resource Fields

The administrator can configure the wording of resource form prompts, as well as the names of the resource fields. These fields names and prompts are used when adding and editing a resource, as well as when a reservation is being made. These fields hold information which give users details about the resource when they are making a reservation.

The default resource "title" is "Resource Name", but this could be configured to be anything - such as "Laptop Number", "Equipment ID", "Doctor", "Hairstylist", "Lab Name", for example. Default resource field names are "Resource Name", "Location", "Capacity", "Phone" and "Notes", and these can be configured to be any names as well.

The following table describes the configurable resource fields settings:

  Form Field Description
1 Resource Title Prompt This setting allows you specify the resource title. The default value is "Resource", but depending on the type of resource that you will monitoring, you may want to change this setting to "Lab", "Conference Room", or "Sports Field", for example.
2 Resource Prompt This setting allows you to override the default "At what time would you like to reserve this resource?" prompt.
3 Recurring Prompt This setting allows you to override the default "Is this a recurring event?" prompt.
4 Resource Field 1 This setting allows you to override the default "Resource Name" field label.
5 Resource Field 2 This setting allows you to override the default "Location" field label.
6 Resource Field 3 This setting allows you to override the default "Capacity" field label.
7 Resource Field 4 This setting allows you to override the default "Phone" field label.
8 Resource Field 5 This setting allows you to override the default "Notes" field label.

Table 14: Resource Fields Settings Form Fields

Add Resource

The administrator can add additional resources for scheduling by choosing the "Manage Resources" button on the Administrative Control Panel, and then choosing the "Add Resource" button from the menu of resource options. The "Add Resource" form will be displayed - enter the requested information in the form and choose the "Save" button in order to add the new resource.

The following table describes the configurable resource parameters:

  Form Field Description
1 Resource Name A unique name that describes a resource.

NOTE: Not all special characters may be used in resource names. Supported special chars are:
( ) { } ! % & *

2 Optional Availability Date Range Optionally define a date range for which to show this resource on the schedule. Entering just a "From" date will allow the resource to be available indefinitely, beginning on the specific "From" date. Entering just a "To" date will make the resource available on the schedule until the configured ending date. Entering both a From and To date will make the resource available only during the configured date range.

If the resource is placed in a category for which an availability date range is defined, the category availability date range will take precedence over the resource availability date range. In other words, if the resource is defined as being available from 03/12/2006 until 10/12/2006, but it is assigned to a category which is only available from 03/01/2006 until 05/01/2006, the resource will NOT be shown as being available after 05/01/2006 because the category availability date takes precedence.
3 thru 6 Location, Capacity, Phone, Notes These default resource fields comprise the generic resource description. You can change the name of these fields through the Administrative Control Panel-->Manage Resources-->Resource Fields option.

NOTE: Not all special characters may be used in resource names. Supported special chars are:
( ) { } ! % & *

7 Image You can specify an image link (URL) that will be shown at the top of the reservation form, preceding the general resource fields. Leave this field blank if you do not want to specify a resource image.

8 Category This is a drop-down list of the categories that are already defined. To associate a resource with a particular category (in other words, to "categorize" the resource), select a category from the drop down list of categories. If the category that you desire is not shown in the selectable drop-down list, use the Administrative Control Panel "Manage Categories-->Add Category" function to add the necessary category.

9 User Permission Level This setting allows you to specify the general permission level of the resource, overriding the General Setting for permission level. The permissions levels have been defined as follows:
1 - Anyone can make single reservations or recurring reservations.
2 - Anyone can make single reservations, but only authorized users can make recurring reservations.
3 - Only authorized users can make single reservations or recurring reservations.
4 - Anyone can make single reservations, but no one can make recurring reservations.
5 - Only authorized users can make single reservations, and no one can make recurring reservations.
10* Give Authorization to All Users (*also Remove Authorization from All Authorized Users during EDIT of resource) When checked, this check box is used to automatically give all authorized users permission to reserve the resource.

During the Edit Resource function only, a second checkbox is available to optionally remove authorization from all Authorized Users. If both boxes are checked, neither one is acted upon. If neither box is checked, no authorized user permission for this resource is added and none is removed.

11 Calendar Placeholder Field/Max Chars This setting allows you to specify a field from the reservation form which will display as the reservation placeholder on the graphical schedule. You must specify the max number of characters to display, and you may have to adjust your timeslot sizes to fit large-sized entries.
12 Fixed Reservation Length This setting allows you to specify a fixed length of reservation timeslots, such that when a user makes a reservation, the timeslot chosen will contain both a begin and end time and the user will not be able to adjust the reservation size.
13 Max Reservation Length This setting allows you to specify a maximum length of a reservation.
14 Reservation Lead Time Create This setting allows you to specify a lead time required when making a reservation for this resource. Reservations will not be permitted within this lead time before the actual reservation date.
15 Reservation Lead Time Cancel This setting allows you to specify a lead time required when deleting or cancelling a reservation for this resource. Reservations will not be permitted to be cancelled within this lead time before the actual reservation date.
16 Max Days Before Reservation This setting allows you configure a number of days in advance for which reservations for this resource will be accepted. This is useful when you only want to allow reservations to be made, for example, 90 days [n days] in advance.
17 Special E-mail Text This setting allows you to specify additional text which will be added to the reservation notification e-mail.
18 Pending Until Approved This checkbox controls whether reservations for this resource are pending until approved by an admin or not. Check this box if you want all reservations for this resource to require administrative approval before accepting them.
19 Pending E-mail Text This setting allows you to specify additional text which will be added to the pending reservation notification e-mail.

Table 15: Add/Edit Resource Form Fields